
Tag: Best Practices

What Is the Lifecycle of a Requirement?

In a traditional IT environment, requirements are created at the beginning, handed down the process, and validated at the end. In an Agile IT environment, requirements represent working software and are created, refined, and revised in a circular process.

So, what does that requirement lifecycle look like in an Agile environment?

Related Article: User Stories & Mousetraps: A Lifecycle of Conversations

vineyardJuly

1) Build the Right Thing

The first step is to identify why we are doing something. Stakeholders come to us with their identified problems. However, it is up to the business analyst to probe for the root cause, the business value desired, and the innovative solution.

For example, a homeowner requests new hardwood floors so they look like the day the house was new. We need to know if the customer wants new floors for $12,000 or to refinish the existing floors at $4,000.

Second, we determine who is using our product. We want to know who is our audience, what matters to them, and how we get their feedback. We can use techniques such as story mapping.

Third, turn key features into requirements that deliver customer value. Once we understand the Why and the Who, we align our feature requirements based on the value it delivers. In this way, we ensure all feature development delivers value, and we reduce the likelihood of waste.

2) Build the Thing Right

Once we’ve determined the right thing, we begin the process of building the thing right. The requirement lifecycle continues to get as independent, small, and testable as possible. This example demonstrates the refinement process.

Vertically slice your requirements to create stand alone, customer-value-driven requirements – not architecture-oriented, stack-oriented, or data-oriented.
  Start: I need a form which collects the number of family members for one unit.
New:
I need to calculate the total number of family members based on number of adults and dependents.
Progressively elaborate further using INVEST   New:
I need to collect the number of adults within a family.
I need to collect the number of dependents within a family.
Break down these requirements into user stories.   For total number of adults:
As a client manager, I want to sum the number of adults based on date of birth in a family so that I can report accurate information to funding organizations.
Add objective, measurable, testable acceptance criteria to measure when the criteria is satisfied.   Acceptance Criteria:
– Must be a whole, positive number
– Must be larger than zero

3) Gather feedback

The lifecycle leads you through the process back to the beginning. You need to collect customer feedback once you’ve implemented an independent, small, testable feature.

At this stage, measure how your customers or clients use the features. Compare results with your goals and objectives identified in your Product Vision. Revisit “Build the Right Thing”. Did you get it right? What do you need to change? What do you need to add?

4 Prototyping Myths and Mistakes a Business Analyst Should Avoid

You live and you learn.
Make better mistakes tomorrow.
Fail faster.

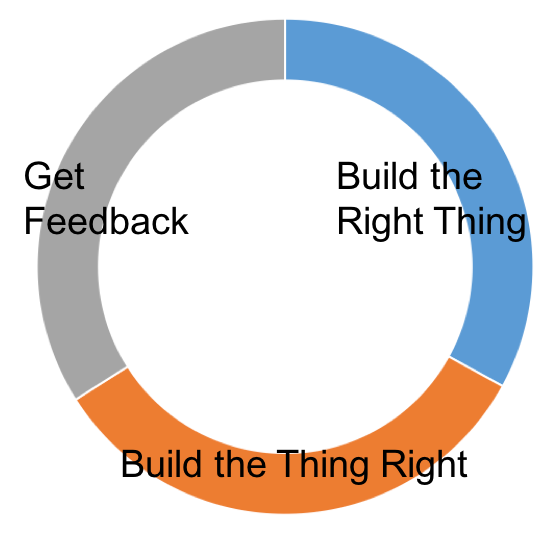
Yes, to err is human. When done right, it’s also an important part of defining and designing great software. From conceptualization to final delivery, you’re likely to design and redesign your ideas countless times using some combination of wireframes, prototypes, and mockups. These tools allow you to translate text requirements into visual ideas, explore them quickly, and correct mistakes early before they get too deeply embedded in your designs and are too costly to fix.

Related Article: Bring Your Requirements Practices out of the 80s

Here’s a brief look at the similarities and differences between wireframes, mockups, and prototypes, and four mistakes to avoid when using them on your project.

Streamlining your design process

One of the best things teams can do early in a project is to level-set about what documents will be used, and what type of information each is meant to convey, so that stakeholders, designers, and developers share the same expectation about when they’ll review the structure and function of a website or application.

Let’s start with wireframes. They’re like the blueprint of a building. Although high-fidelity wireframes are used, most tend to be low- to medium-fidelity schematics that help you understand the layout and arrangement of all the things that must fit into the space. They’re quick to produce and share, and help teams focus on big picture basics versus detailed design elements. But a blueprint is not a house. As a static image, a wireframe won’t let you see how the thing you’re designing would fare when used by a human.

Mockups are a little harder to define because they often mean different things to different people. I’ve seen the term used for something that resembled a lo-fi wireframe, but also used for something much higher fidelity that resembled the final product. That said, the term is most often used for something that takes wireframes a step further, possibly adding color, type choices, images, and even functionality.

That’s where prototypes come in. They’re a powerful medium for testing perspectives and interactions–all the things that make the product really work. Since they’re meant as a testing device, having some detail makes sense to give users context.

Agreeing on how these tools are used in the design process helps us dismantle our first mistake:

Mistake #1: Treating them exclusively as a design tool

It’s a mistake to think that wireframes, mockups, and prototypes, should only document the contributions of someone whose title includes the term “designer.” Hold on, though. Before you get your pitchforks and torches, let’s be clear about what we’re saying. Text-based BRDs still have their place. And maybe that place is a bit closer to the design than it’s been in the past.

The most innovative companies in the world understand that design is a verb, not a noun. It’s not about creating design documents. It’s about designing a process that’s participatory and collaborative.

Couldn’t you say that a business analyst who is eliciting requirements is starting the design process? How about a developer who’s thinking about the script for a page load indicator? Neither fits neatly into traditional concepts of design, but they’re each crucial to the end result.

When designs miss their mark, it’s not necessarily because you have bad designers or business analysts on the team, or that your user stories were poorly written. It’s more likely that there was a communication breakdown somewhere in the line. Finding ways to integrate documentation is a way of approaching the human-centered design process so that it benefits not only the end user but also your project team.

Think about the value of facilitating collaboration and communication by allowing teams to view comments, annotations, and requirements in the same screen as the designs. It’s social and synchronous and eliminates a lot of the errors of passing documents back and forth and hoping details don’t slip through the cracks or get misinterpreted by other team members.

Mistake #2: Believing You Have To Give Up Speed Or Detail

As the old project management joke goes, when creating a project, clients can choose to have it done fast, good, or cheap. But they only get to pick two. The notion being that to get a project done fast you’d have to give up detail and accuracy. On the flip side, nailing down the details would take a long time and come at a pretty hefty cost.

The mistake in this scenario is overlooking the flexibility teams have in how much detail they’ll provide in each deliverable and at each stage of the design process. It also ignores the relatively new tools now available. Wireframes, mockups, and prototypes can work to help quickly define the layout and function of the application. The impact that these visual and interactive tools have on speed and detail can’t be overstated.

Which deliverable is most useful depends on your project and the problems you’re trying to solve. We’ve all used rudimentary wireframes to get through initiation, or rapid prototyping to walk through user flows, drive analysis, and find functional gaps. As more teams adopt Agile and Lean methodologies, it makes sense that the tools driving requirements, user stories, and design should evolve too.

When teams can use visually interactive tools, collaborate, iterate quickly, validate and build consensus, you’re actually able to get both more speed and detail.

Mistake #3: Focusing on the outcome instead of the process

It’s common for teams to concentrate mistakenly on using wireframes and prototypes to problem solve on already decided upon directions and ignore the value these tools offer in ensuring the right questions are being asked before answers are agreed on.

The danger in focusing too intensely on finding solutions is that it locks you into a certain way of thinking. That’s the opposite of innovation. In building any software application, you’ll find that using the right design tool can elicit requirements that hadn’t been thought of yet, and expand the number of opportunities for finding the simplest and best approach.

Rather than schedule reviews featuring big reveals, teams should embrace opportunities to walk through designs and requirements together and ask things like, “How would you expect this to work?” or “Where is the user taken after they click this button?”

The future of collaboration needs to include integrated environments where wireframing or rapid prototyping can happen in the context of mapped requirements, comments, and annotations–not separate from them. This approach holds the promise of stanching inefficient practices like blind handoffs that lead to broad interpretation or worse, back-and-forth email discussions that block progress or broaden the scope.

Reviews that include the right stakeholders and focus critique to specific problems tend to stay focused, productive, and on track. When all of that happens in the context of the design itself, it will help you identify problems and definitions as well as iterate ideas and test their validity. In short, you’ll get better answers, faster.

Mistake #4 – Elevating aesthetics over annotation and agreement

Better design does not mean most viewed on Dribble. As design programs continue to proliferate and become increasingly specialized and fine-tuned for UI design, it can be tempting for talented designers to spend hours nudging pixels to get a layout just right. But to what end?

Great design is as much about user interaction as it is about pixel perfection. Spend the time finding the right cadence to design, review, test and repeat.

Find a tool that allows you to review designs together, elicit feedback, and iterate on what you’ve heard in real-time. If they can integrate with your existing ecosystem, allowing communication and traceability with the tools the rest of your teams use, even better. This allows timelines to be adjusted immediately. If you’ve ever worked on a distributed team, you know the value of having teams work in unison and how hard it can be to implement.

Use prototypes as visual expressions of text requirements that help business stakeholders and development teams gain consensus on whether or not business and functional requirements have been met.

And keep in mind that the heart of consensus is a based on a cooperative process where everyone’s input is carefully considered to craft the best outcome. The more methods you use to compile and summarize that input, the harder it is to synthesize the information you’ve gathered into a solution that represents a commonly agreed and accepted set of features and functions for your release.

Getting to a single source of the truth

When one team owns requirements, another design, and a third workflow and timeline documents, it’s hard to agree on where you are or what to do next. Current design tools only exacerbate the problem, focusing on rendering images without providing enough context or connection to other project documentation. Lack of requirements integration is truly an Achilles heel of today’s software design process.

As the Agile Manifesto alludes, the primary issue with communication is one of understanding, not of documentation. The best approach to avoiding the common mistakes listed here is to base collaboration, not around documents that merely reflect design decisions, but around shared communication tools that offer teams a single source of “truth” to rally behind and shape decisions on.

Requirements in Context Part 7: Detail Online Functional Requirements

The standard for business information systems today is on-line access by business users via graphical user interface (GUI) screens.

In addition, the current trend is towards customer self-service via web-based portals. This article deals with detail functional requirements for these on-line interfaces.

Related Article: Requirements in Context Part 6: The Evolution of Computerized Business Functions

Screens are similar to reports in that there are aspects of both form and content to the data being displayed. Form is about usability and understandability. Content is about the fields necessary to the business function(s) that the screen is intended to support. Detail functional requirements should definitely address screen content. The issue of form need only be addressed in situations where there are specific business requirements that must be met, such as where a screen is intended to capture data from a paper-based form that has a pre-defined layout.

NOTE: The concept of usability testing, which more typically applies to customer-facing screens, is outside the scope of this series.

Screens significantly differ from reports when the screen is intended to be used for data capture as well as display (a trick reports have yet to master). Additional information needs to be recorded about each input field as part of detail functional requirements. This detail will be addressed below. But first, we need a context for these fields. That context is the screen that contains the fields. So the initial question during detail requirements is, “What screens are required?”

Screens Supporting Business Activities

The reason a business user requires a screen within a business information system is that they are performing a particular activity. The reason a customer requires a screen is that they are at a particular point in a product life cycle (e.g. applying for, purchasing, transacting, status checking).

A separate but related activity to detail requirements gathering is business process modeling. Part 2 of this series talked about business models in general and the concept of functional decomposition. Part 4 of the series talked about defining high-level requirements that made reference to a specific business process or activity. Being referenced in a high-level requirement (HLR) indicated that the process or activity was in scope and due to be considered in more detail from a requirements perspective.

Ideally, the more detailed process models would either be done prior to or else at the start of detail requirements gathering. The modeling of in-scope processes should be done to a level where activities represent a single user performing a single task without the need for interruption or involvement by other users. Those activities that are intended to include some on-line involvement then become the focus of detail requirements.

The example functional HLR from Part 4 was based on the following high-level process diagram:

tasker june19

The HLR read:

The system shall support customers making on-line purchases including selecting products, specifying shipping details, providing payment details and confirming the order.

The fully detailed process model would account for a number of product selection-related scenarios including de-selecting items or changing quantities. The business may want customers to have the ability to save and choose from multiple delivery addresses. They would also specify what payment methods they want to be supported. Then there is always the exception scenario to be modeled where the order is abandoned rather than confirmed.

What we are primarily interested in is the fields required to support a unit of work. Whether those fields are all bunched into a single screen or spread out across multiple screens is a combination of usability and convenience. A rule of thumb is that users who perform a task often prefer one big screen that allows them to focus on getting the data entered whereas casual users appreciate the fields split out across multiple screens, grouped in easy-to-understand bunches and lots of help text.

The point from a detail requirements perspective is that there is some screen context that allows the fields to be talked about and specified in support of the activity.

Field-level Detail Requirements

Part 5 of this series discussed the necessity for detail requirements to cover every field that is needed by the business. The same template concept that was presented in that article for reports can be applied to screens. This allows the field-level detail to be captured in the template rather than in individual field-specific requirements.

A template for fields included on a screen should begin by capturing details about the screen itself. Those details should include:

  • Name (e.g. Order Confirmation)
  • Description of access path(s) to it (e.g. via what menu options or prior workflow step(s))
  • Description of navigation path(s) from it (e.g. if part of a workflow)
  • Description of any security considerations (e.g. user roles that have full or partial access)

The template should then provide for details about individual fields including:

  • Label or column heading
  • Display only or editable
  • Conditions under which a value is mandatory
  • Information regarding a default value
  • Field length or numeric size/precision (both development and test team will want to know)
  • Valid value information (again, supports development and testing)
  • If the values are drawn from a pre-defined value set, information about the source of the values (supports configuration)
  • If the value is derived, details about its derivation (see “Next Time…” at the end of this article)
  • Help Text
  • Example Value(s)

There should be provision for including a layout of the screen for cases where form is an issue at requirements time.

So, with the above details populated in a template an example of an on-line functional detail requirement becomes:

User Story Format:

As a customer, I want to see the details of what I just ordered on-line so that I have confirmation of the order I just submitted with all of its detail.

Shall Statement Format:

The system shall display the details of the order that a customer placed on-line in response to the order having been submitted.

Either format should include acceptance criteria:

Acceptance Criteria – Order Completed Successfully

  • Given a customer placing an order on-line
  • When the customer has completed the order process including confirming the order
  • Then the details of that order are displayed as per the “Customer Order Confirmation Screen” specification found Appendix C.

The first acceptance criteria should be the ‘happy days’ scenario. Subsequent criteria should cover alternate process model paths and exception scenarios (e.g. items with sufficient inventory when added to the shopping cart were out of stock by the time the order was confirmed).

NOTE: The template concept with all of its detail applies to requirements where a whole screen is to be delivered. In cases where there is an existing screen that only requires a small number of changes (e.g. one additional field), a stand-alone detail requirement would be sufficient.

Generic Screen “Look & Feel” Requirements

A classic non-functional requirement is that the application should be ‘easy to use’. This, of course, is next to meaningless and virtually unmeasurable. What is reasonable to require is that the application have a consistent look and feel. Fortunately these days most applications are built on what is called a ‘Framework’. This framework provides generic look & feel functionality that applies to all screens such as:

  • Menu/sub-menu structures
  • Save / Cancel / Undo / Redo Functionality
  • Back / Forward button functionality
  • Searching – filter fields, result list scrolling/paging, column sorting, navigation from selected row
  • Parent / Child screen functionality (e.g. adding a new record or a child line item within a parent)
  • Date field Calendar popup
  • Selectable value field – value list presentation
  • Mandatory Field indication
  • Field validation error display (e.g. where messages appear, how the field in error is identified)

Because the framework applies to all screens within the application it’s unnecessary to include requirements about these capabilities as part of an individual screen requirement. When looking to acquire a package solution the overall look & feel should be considered. If developing an application from scratch, consideration should be given to choosing a good framework to build it on.

Next Time – Detail Requirements For Derived Data

One thing that has only been touched on lightly so far is fields that represent derived data. This applies not only to screens but to reports and interfaces. It also applies to one additional functional area not yet mentioned – batch jobs that generate periodic transactions (e.g. interest payments, period rebates). In those jobs, a value is derived along with a record that represents the context of the value. All to be discussed next time.

NOTE: My current intention is to wrap up this series in the next installment (but follow that with a summary article of the form “N things every BA should know …”). Meanwhile, if I’ve missed out on a topic you feel should have been included in this series, now is the time to add a comment about it.

5 Tips for Successful Lessons Learned

Call it what you want – look back, reflection, retrospective or post-mortem – but an effective lessons learned session is sometimes harder to come by than most people realize.

During most projects, best case is that people are able to identify problems or roadblocks and fix them quickly; worst case is most people are heads down in the actual work and don’t stop to think about what might be going wrong or what might work better. Or somewhere in between. For longer projects or multi-phased projects, lessons learned sessions can make the difference between future success or status quo.

Related Article: 5 Lessons Learned from Harry Potter in the Room of Requirement

Holding a Lessons Learned session has many challenges. There is always the danger that it will deteriorate into a complaint session or that people only remember what happened in the last week or two of the project. Successful lessons learned sessions are held with some degree of frequency throughout the project, include all working members of the team, even if individuals have moved on to other projects and be an organized part of the overall project plan.

1. Capture in the moment

Use google docs, company wiki, outlook task or note, email to yourself, running list in a spreadsheet or even writing in a special notebook for those of you still like pen and paper. It’s important to capture the details of what happened, why it was good or bad, the impact of the event and how to avoid it or promote it for the future. Otherwise, you might end up forgetting, exaggerating or blaming.

2. Encourage openness

The only way the feedback is valuable is if people are encouraged to be honest and open about how something went. If someone really feels like they can’t speak up, you probably have a bigger problem.

3. Plan ahead

Outline the lessons learned process at the beginning of the project so the entire team understands how the information will be used. Define the timeframe (every three months we will have a lessons learned), the structure (identify an event and the impact) and how team members should capture the information (see #1).

4. Summarize

For the actual meeting, provide a summary of common comments, solutions or tasks that should be entered as future best practices. Don’t call out any one individual’s comments. Center the discussion around the summary points.

5. Implement

Have the team figure out solutions and how to best implement, then assign tasks. Get buy-in and commitment from group to do what will make the project better. Lessons learned only work if you actually use what you learned (duh!).

It’s also important to communicate best practices to a larger group or team. Depending on the size of the organization, many lessons learned can be packaged for other teams. Try to keep tools and summaries in a central place for future reference.

My own personal experience with lessons learned came from working on several high-profile corporate initiatives in a busy IT department. As a participant, I witnessed several sessions degrade into angry finger-pointing sessions. As a first time Quality Assurance (QA) lead on a highly visible project, I set the expectation at the beginning of the project in order to get quality feedback. The first time one of the QA’s came to me with a complaint about something, my response was, “please write this down on a document or as a task so that we can make sure it doesn’t happen again.” After addressing whatever issue was causing the complaint, I moved on.

For each iteration (usually monthly), our team got together and discussed issues and what we might change in the future. Then we assigned actions items to those things we knew we could fix, brainstormed mitigations for risks we couldn’t fix and documented everything for future iterations of the project.

In order to solicit feedback that is constructive in nature, I also kept my own list of issues. Sometimes, the items on my list were the result of an emotionally charged confrontation or failure in one part of the project – either a team member or a business partner who wasn’t fulfilling their role responsibilities, personality conflict or an area where I failed to recognize an issue, which then escalated. When I reviewed the list before holding the meeting, several topics usually fell off the list because my temper had cooled down a bit and I recognized that it would not be a productive topic for the look back. However, many of the items on my list also made it onto everyone else’s list which provided the starting point for conversations during the session.

Lessons learned provide a huge opportunity to improve individual projects and institutionalize best practices uncovered during the process. Harnessing the best ideas and suggestions from the team is the easiest way to get good results for the future.

Strategy Spotlight: 8 Ideas for Creating a Common Language and Communication Plan

While visiting a Director of Enterprise Analysis at a large utilities company, we started to discuss their key challenges.

They had lots, but the one we honed in on was the need for a common language and a communication plan to improve communications among stakeholders.

This is a challenge for most organizations.

So how do you go about creating a common language and a communication plan to make your efforts easier?

Here are 8 ideas for creating a common language and communication plan for your initiative.

1. A Communication Map or Plan

As part of your process, you need to discuss communications early from both an internal and external perspective. Whatever message you will be delivering needs to be consistent. In today’s world of click-of-a-button information and communication dissemination, there’s no leeway for inconsistent messaging. We no longer have the luxury of writing complex communication plans. Nowadays a communication map must have the message and all channels of communication in one place with a single view.

2. Clear Definition of Words and Terms

This is one I have worked on for every assignment I have ever done, and it is not always easy. In one of my training programs, Gathering and Documenting Business Requirements, I get the participants to develop a decision grid for going to a restaurant for dinner at the end of the day. Each team has to pick three places, identify their criteria and apply a rating system (which I supply) to make a decision and come to a consensus. The participants think this is simple to do when they start but as they work through the process they discover it is not always easy. Why? Lack of a common language.

Related Article: Improve Communication for Better Collaboration

Often the criteria for selection becomes words like the restaurant must be close, accessible, good food, good service, have character, etc. I always have to ask the participants to define their words. For example, accessible could mean: a) that the restaurant is on the right side of the street so no one has to make a left turn into traffic, b) that you can park on the street and get out of your car and just walk in, or c) that people with wheelchairs have easy access to the restaurant and all the facilities. One word with different interpretations requires you to create a common language.

3. It’s Going to Happen One Way or Another

No matter the work you are involved in, communications is going to happen one way or another. So you need to come up with an approach that allows you to get ahead of the communication curve. One of my highly successful business associates told me last week that to get ahead of the communication curve you need to “be everywhere”. From their perspective, you need to have a social media plan with your message and words clearly defined, timed and placed consistently both internally and externally to your business environment. The thing to remember is communication is going to happen anyway. People will talk. So you need to ensure that you are out there delivering the message everywhere.

4. Give the People What They Want

Interestingly, what management thinks motivates people and what employees say is rarely the same thing. Management tends to think wages and job security are the most important factors for people, but many employees prefer inclusion, involvement, and to be appreciated for their work. This sentiment might vary depending on the working generation being reviewed, but in general, people want communication. They want you to have a conversation with them, not to merely tell them what’s going on and what to do. Given a lack of communication, people will invent their own ideas. As a professional, it’s important that you take the lead and make sure you’re providing the right amount and right level of communication for people.

5. Focus on Your Audience

Today it’s especially important to know your audience, especially considering all the possible communication channels and mediums available and the specific needs of each target audience and sub-audience. To avoid speculation, you’ll need to create an effective communication program that is audience-driven. You need to go back to your stakeholder analysis and revisit interests, goals, motivation, impact, and influence. This will allow you to design a communication platform that connects with your audience—both internally and externally. Your common language and communication map should make the distinction between the internal and external stakeholders, as well as establish a connection with your stakeholders. The main point, though, is to make sure you address your audience’s needs.

6. Know What You Need

There is no purpose to having a common language and communication plan unless you know what you want to achieve. Is it high-level or are you trying to communicate with the people who are responsible for the work itself? The people who are responsible are the doers—they get stuff done. The people who are accountable are where the buck stops. These are different audiences with different information and communication needs. Another difference, you will need to consult with some people, yet only keep others informed. Make sure you’re clear on who is who.

7. Core Items to Consider

There are many items to be considered when you’re looking at your communication plan and the development of a communication map. Identifying and finding the best way to communicate with your audience will be the key to your successful implementation of your plans. The communication analysis and planning process is similar to the overall work you do as a business analyst or project manager – you’ll still need to consider your stakeholders’ wants and needs. You’ll also need to find the appropriate vehicle to communicate the overall goals and objectives, the plans features, benefits and values, and find a way to address your stakeholders’ questions.

8. Follow a Structure

A common language and communication plan follows a structure. Start with defining your language early on. You may need some people to help you with this. You can start filling in a communication plan early for your different stakeholder groups. Make sure your communication plan is revisited regularly, perhaps as part of the regular meeting, once a month or every two months. Make sure you re-evaluate it after six months, however, and revisit it as part of your lessons learned review. The truth is creating a common language and a way to communicate becomes a living document that you need to review and keep up-to-date to ensure you are communicating appropriately in your business organization. It needs to stay alive.

Final Thoughts

For reference purposes this blog has been adapted from the book SET for Success, and the chapter on communication plans and maps. When it comes to communications, we all need a common language and a communication plan in our work and business. It’s the last piece of the puzzle and is part of the analysis, planning, and implementation cycle from the beginning to the end. More importantly, it’s part of the implementation and transition process that ensures your initiative gets successfully implemented. If you would like a copy of my communication template, let me know. I will send it to you.

Remember,

Do your best,

Invest in the success of others, and

Make your journey count.

Richard.